15 Sep 2017
|
springboot
each
thymeleaf
param
${param}변수를 th:each를 태워 Request의 모든 파라메터를 출력하는 예제 소스 입니다.
<!DOCTYPE html>
<html lang="en" xmlns:th="http://www.thymeleaf.org">
<head>
    <title>Title</title>
    <link rel="stylesheet" href="https://maxcdn.bootstrapcdn.com/bootstrap/4.0.0-alpha.6/css/bootstrap.min.css" integrity="sha384-rwoIResjU2yc3z8GV/NPeZWAv56rSmLldC3R/AZzGRnGxQQKnKkoFVhFQhNUwEyJ" crossorigin="anonymous"/>
</head>
<body>
<div class="container-fluid">
    <div th:each="res : ${param}">
        <div class="row"><div class="col-2" th:text="${res.key + ' : '}"></div><div class="col-6" th:text="${res.value[0]}"></div></div>
    </div>
</div>
</body>
</html>
14 Sep 2017
|
springboot
attr
thymeleaf
th:attr사용시 변수와 문자열 섞어 쓰는 방법을 정리해봅니다.
예를 들어 http://localhost:8080/demo/test 와 같은 URL값을 input value에 넣을 때 ‘http://localhost:8080’를 변수처리 하는 방법입니다.
# application.yml
base.url: http://localhost:8080
설정 파일에 위와 같이 설정 되 있을 경우 html파일에서 다음과 같이 사용 할 수 있습니다.
<!-- html source -->
<input type="text" th:attr="value=${@environment.getProperty('base.url') + '/demo/test'}"/>
환경 설정 값에서 가져오기 위해 @environment.getProperty를 사용했고 문자열을 ${...} 안에서 + 기호로 합치면 됩니다.
13 Sep 2017
|
springboot
yaml
octal
문제
프로그램 버그를 잡는중 아래와 같은 문제가 생겼습니다.
 # apllication.yml
 tran-cd:
    req: 00100000
@Value("${tran-cd.req}") private String code; // expect "00100000" but "32768"
위와 같이 해당 설정값이 이상하게 변경되어 있는 것입니다. “00100000”로 나와야하는데 자꾸 “32768”로 나옵니다.
문제는 yaml 1.1 버전에서 맨 앞자리가 “0”으로 시작하면 해당 값을 8진수로 인식하게 되고 Spring에서 @Value로 가져올 때 해당 값을 10진수로 변경하여 String 으로 반환하는 것이였습니다.
해결방법
yaml에서는 쌍따옴표(double quotes), 외따옴표(single quote)로 문자열을 쌓을수 있습니다.
#application.yml
tran-cd:
    req: "00100000"
그 외
yaml문법중 %YAML 태그를 이용하여 버전을 명시 할 수 있습니다.
YAML 1.2에서는 8진수 표현법이 바뀌어서 위와 같은 오류를 막을수 있으나 application.yml에 적용해도 위 문제가 해결되지 않는 것으로 보아 SpringBoot에서 쓰는 Yaml Parser가 1.1로만 인식하나 봅니다.
해결 방법은 찾지 못했네요.
참고
%YAML 1.1 # Reference card
07 Sep 2017
|
nodejs
express
expressgenerator
처음 Node.js 개발환경을 구성 할 때 이것저것 설정할게 많은데 간단하게 “Node.js + Express”구조의 뼈대를 만들어주는 express-generator라는 도구가 있습니다.
“Java + Spring Boot” 개발환경의 뼈대를 만들어주는 Spring Initializr와 비슷한 녀석입니다.
설치
npm을 통해서 아래와 같이 설치합니다.
$ npm install -g express-generator
프로젝트 만들기
express라는 명령어로 실행이 가능한데 도움말을 보면 아래와 같이 설정을 볼 수 있습니다.
$ express -h

  Usage: express [options] [dir]

  Options:

    -h, --help           output usage information
        --version        output the version number
    -e, --ejs            add ejs engine support
        --pug            add pug engine support
        --hbs            add handlebars engine support
    -H, --hogan          add hogan.js engine support
    -v, --view <engine>  add view <engine> support (dust|ejs|hbs|hjs|jade|pug|twig|vash) (defaults to jade)
    -c, --css <engine>   add stylesheet <engine> support (less|stylus|compass|sass) (defaults to plain css)
        --git            add .gitignore
    -f, --force          force on non-empty directory
먼저 express를 이용하여 뼈대가 되는 소스를 만들고 해당 프로젝트 폴더 내에서 npm install을 실행하여 dependency를 다운 받고 사용하면 됩니다.
만약 template engine은 handlebars를 사용하고 css engine은 sass를 사용한다면 아래와 같이 실행하시면 됩니다.
$ express --view=hbs --css=sass <project dir>
$ cd <project dir>
$ npm install
$ npm start
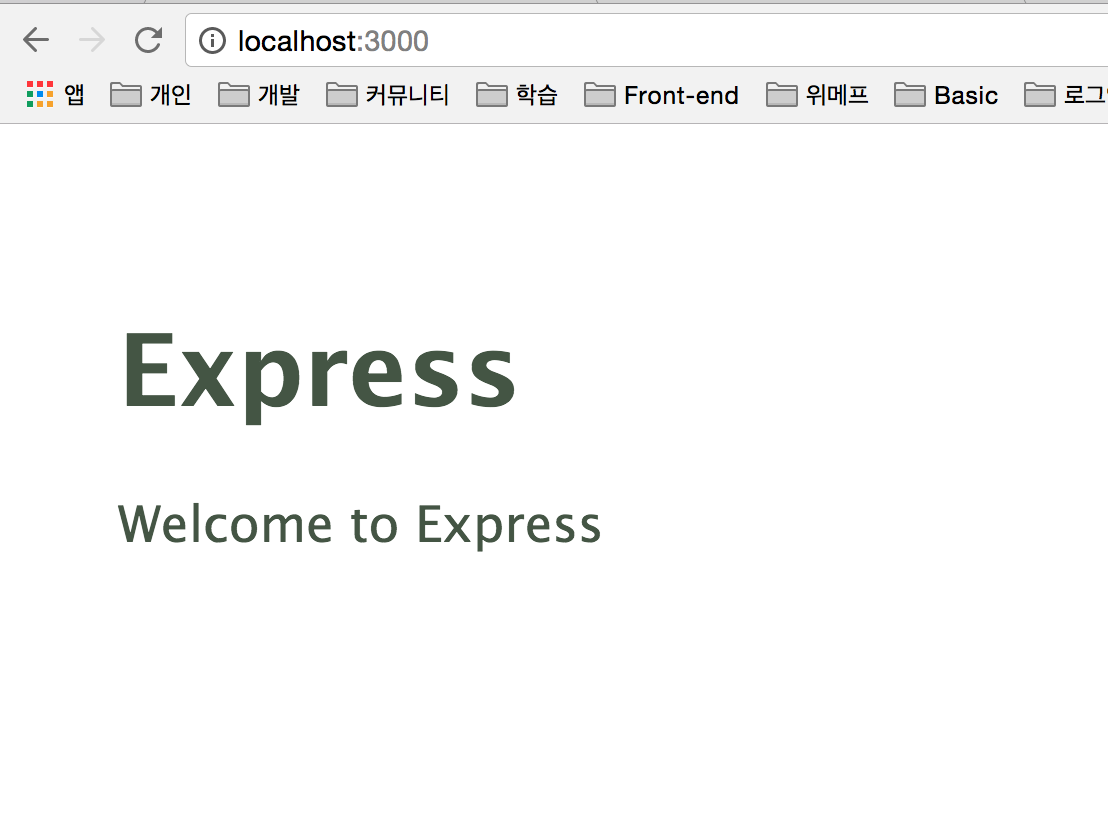
기본적으로 package.json에 start커맨드를 통해 서버를 올릴 수 있도록 script를 만들어주며 실행시 http://localhost:3000으로 접속하여 동작 화면을 확인 할 수 있습니다.
app.js 파일을 열면 다음과 같이 template/css engine이 설정 되어 있는 것을 확인 할 수 있습니다.
// app.js
// view engine setup
app.set('views', path.join(__dirname, 'views'));
app.set('view engine', 'hbs');

...

app.use(sassMiddleware({
  src: path.join(__dirname, 'public'),
  dest: path.join(__dirname, 'public'),
  indentedSyntax: true, // true = .sass and false = .scss
  sourceMap: true
}));
SASS 변경하기
설정을 보면 기본적으로 sass를 사용하도록 되어 있습니다. 저는 scss확장자를 쓰고 싶으니 변경해 보도록 하겠습니다.
// app.js
app.use(sassMiddleware({
  ...
  indentedSyntax: false, // true = .sass and false = .scss
  ...
}));
기본적으로 CSS경로는 /public/stylesheets 하위로 설정되어 있습니다. sass파일을 scss로 바꿉니다.
그리고 설정을 scss문법에 맞게 수정합니다.
// style.scss
body {
  padding: 51px;
  font: 25px "Lucida Grande", Helvetica, Arial, sans-serif;
  color: #445544;
}

a {
  color: #AAB7FF;
}
node-sass-middleware의 옵션 중에 css파일을 압축해주는 ‘compressed’ 옵션이 있습니다. 아래와 같이 적용해봅니다.
// app.js
app.use(sassMiddleware({
  ...
  outputStyle: 'compressed',
  ...
}));
적용이 완료되고 npm start명령을 통해 서버를 실행하고 http://localhost:3000을 호출하여 다운받은 style.css파일을 확인하면 다음과 같이 변경된 것을 확인 할 수 있습니다.
css/template파일을 변경시 바로 적용되나 app.js파일 수정시에는 반드시 express server를 재시작해야 합니다.

참고
npm express-generator
npm node-sass-middleware
07 Sep 2017
|
nodejs
express
troubleshooting
webstorm
expressgenerator
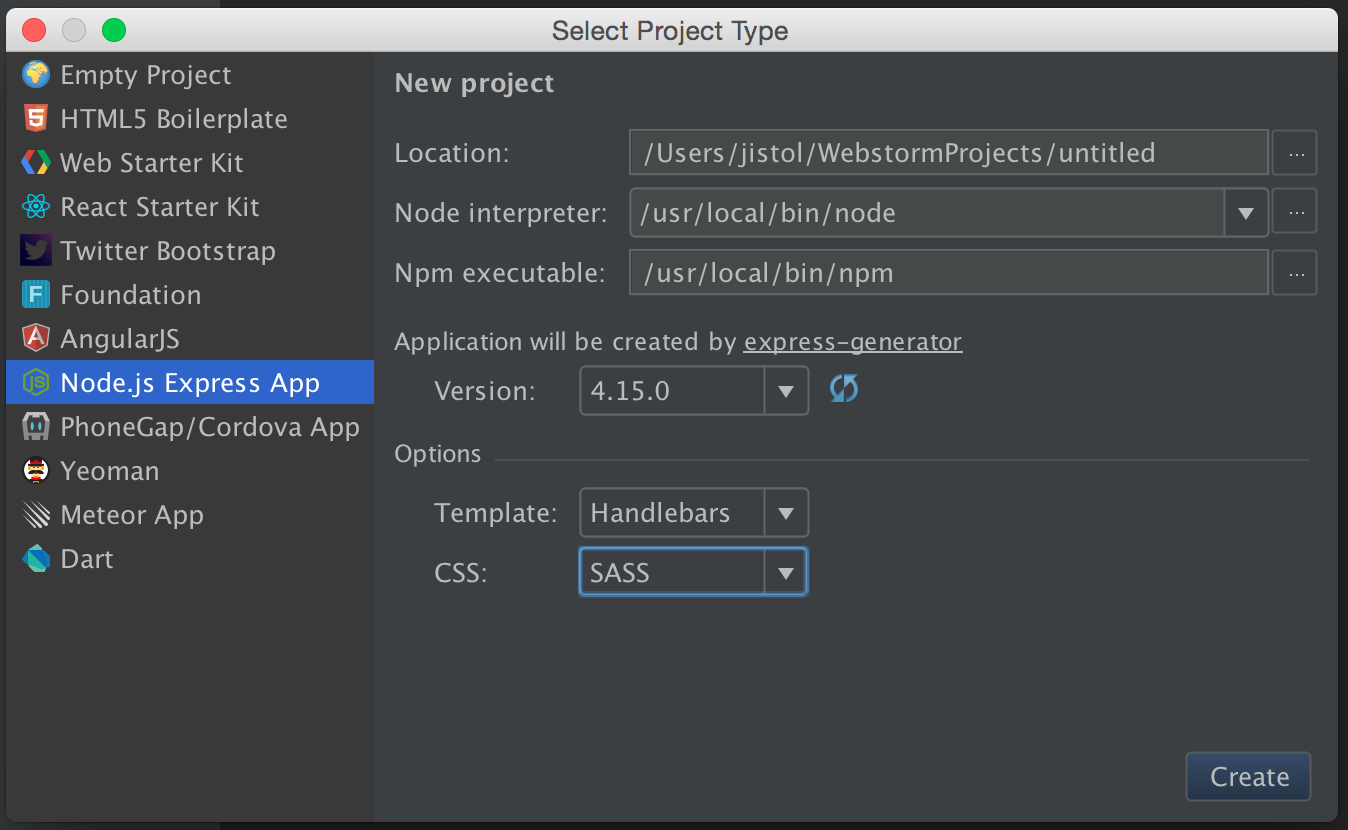
Node.js로 개발해보려고 WebStorm에서 Node.js 프로젝트를 생성하다가 아래와 같은 오류를 만났습니다.
Error creating Node.js Express App. Cannot find
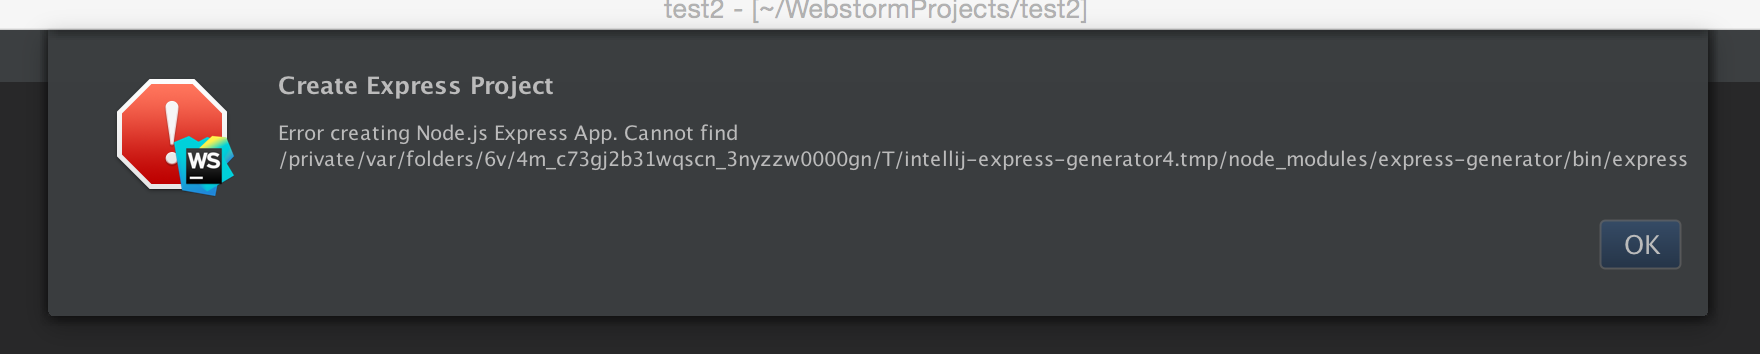
구글링을 해보니 답변은 express-generator를 이용하여 만든 후 WebStorm에서 해당 폴더를 오픈하여 프로젝트를 생성하라고 하더군요. (Error creating Node.js Express App. Cannot find)
생성 방법은 아래와 같습니다.
$ npm install -g express-generator
$ express <project_name>
$ cd <project_name>
$ npm install
자세한 생성 방법은 express-generator - Node.js + Express 프로젝트 생성하기를 참고하세요.
위 명령 실행 후 WebStrom에서 Open하여 사용하면 정상적으로 만들어져 있는것을 확인 할 수 있습니다.
또 다른 방법으로는 WebStorm에서 Node.js 프로젝트 생성시 사용하는 express-generator버전을 낮춰서 해결 할 수 있는데 “14.14.1”로 낮추면 정상 생성 가능합니다.
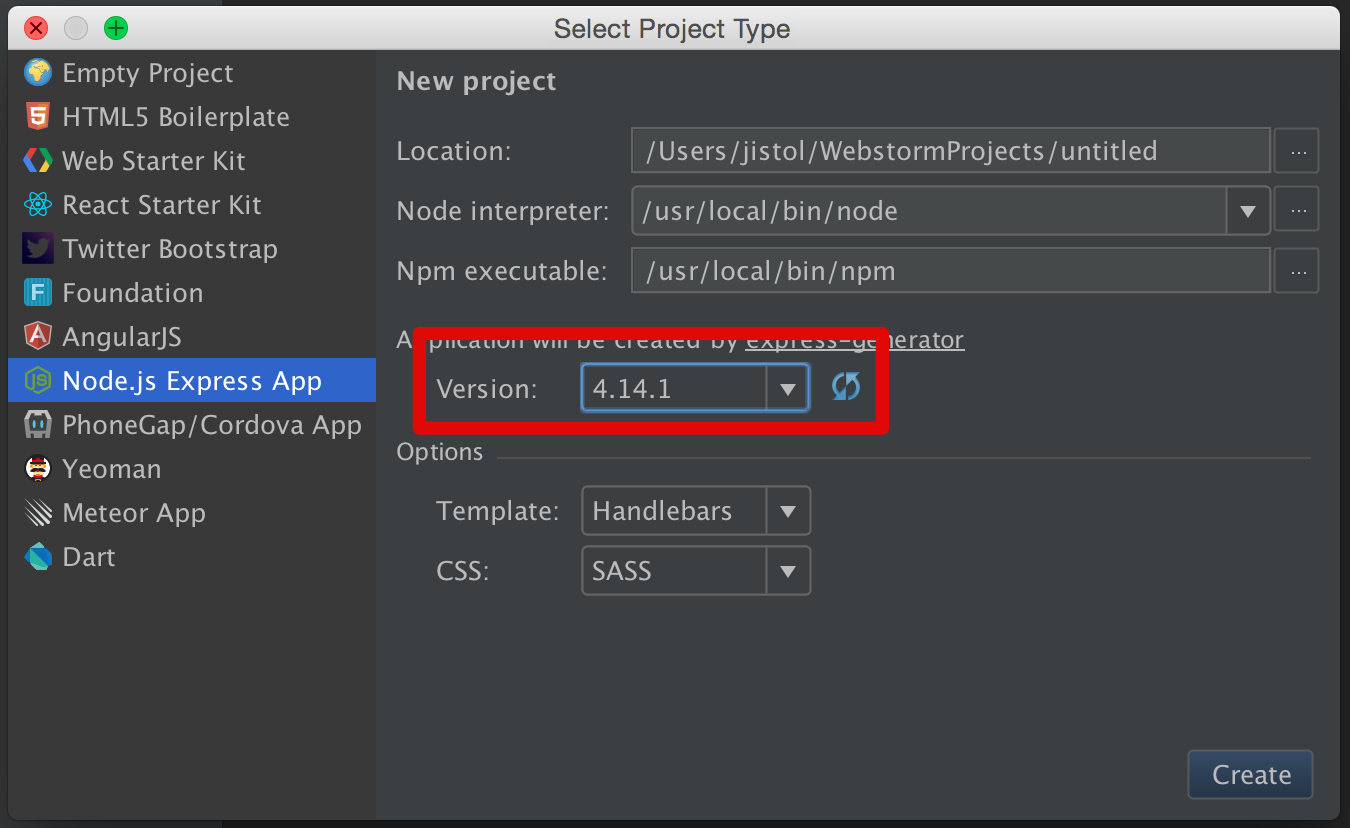
4.13.0 버전 이하로 낮출 경우 SASS를 쓸 수 없으니 주의하세요
참고
Error creating Node.js Express App. Cannot find